.png?width=239&height=70&name=UnbiasedPro__Logotype__Primary_RGB_HR%20(3).png)
For further information, please refer to our more detailed text-based guides.
Your Unbiased API Key
Start by generating your Unbiased API key.
Configuring Zapier
Log into your Zapier account (creating one if you don't have one already).
Create a new Zap (and authenticate your Unbiased Pro account)
Once logged in, follow the instructions in this video to start creating a new Zap (automation) and authenticate your Unbiased Pro account using your Unbiased API key from the previous step.
Configure the Desired Action
Having connected your Unbiased Pro account to Zapier and set up a trigger for when the automation is run, then next step is to tell Zapier what action it should take (e.g. send the enquiry data to your CRM).
There are two example videos provided below. One sends data to a spreadsheet (as this is very similar to sending the data to a CRM already supported by Zapier). The other example uses webhooks (in case your CRM is not supported by Zapier but the CRM does support webhooks).
Example 1: Send data to supported CRMs directly
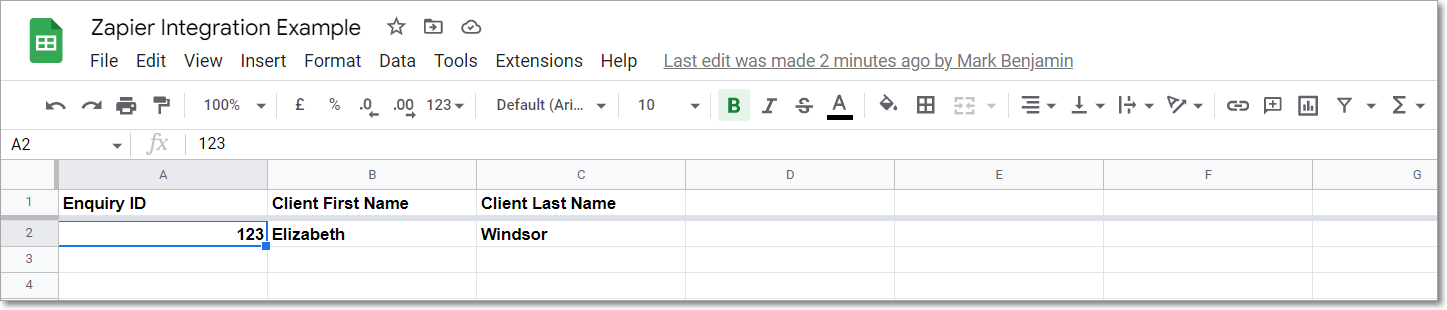
This is a screenshot of the test results
Example 2: Send data to other CRMs via Zapier webhooks
Note that this requires a paid Zapier account.
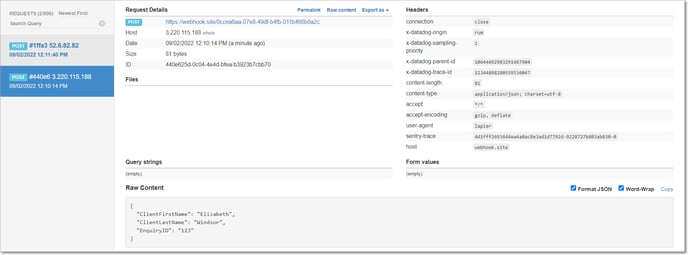
This is a screenshot of the test results (note that normally the data would have been sent to your CRM via webhooks, so ultimately you'll check the enquiry data in your CRM rather than in a development environment).
Real-World Testing
With your Zap turned on, the next time you accept an enquiry in Unbiased, you should check that the enquiry has been added to your CRM as expected (it may take a few seconds for the data to transfer between systems).
Should you want to make any changes, you can edit your Zap. Once done, remember to turn your Zap back on!
Changing your Unbiased Pro Account
In case you ever want to change the Unbiased Pro account that your Zap is configured to monitor, follow these steps...
First, copy the new API key from your new Unbiased Pro account.
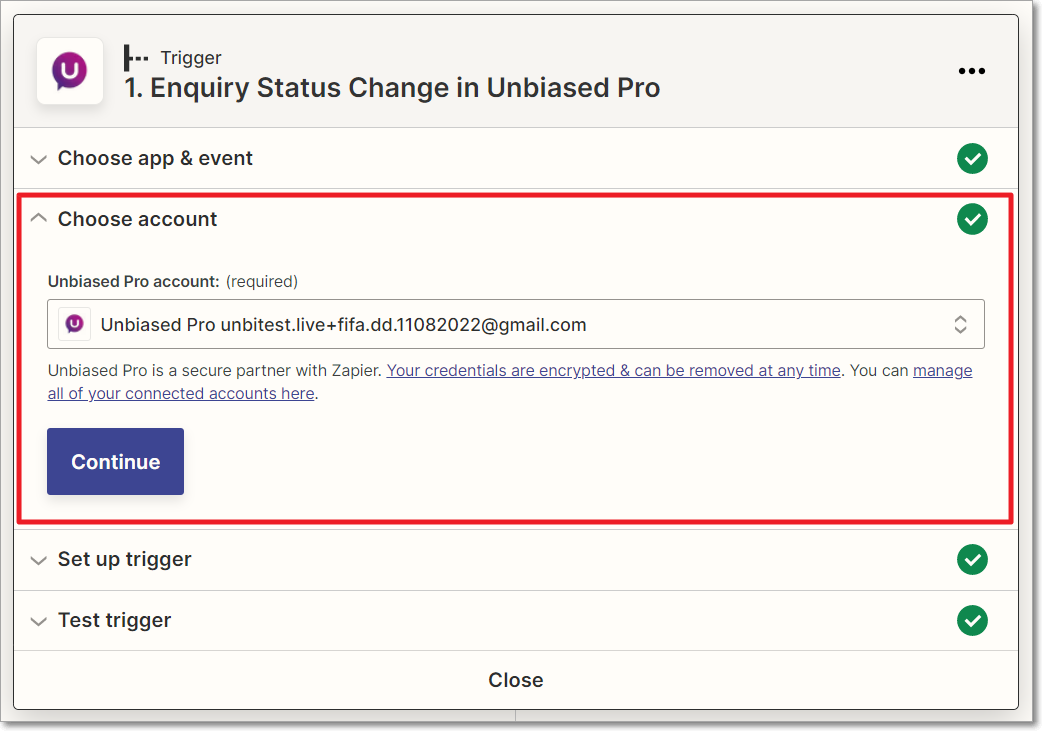
Next, open your Zap and hit Edit

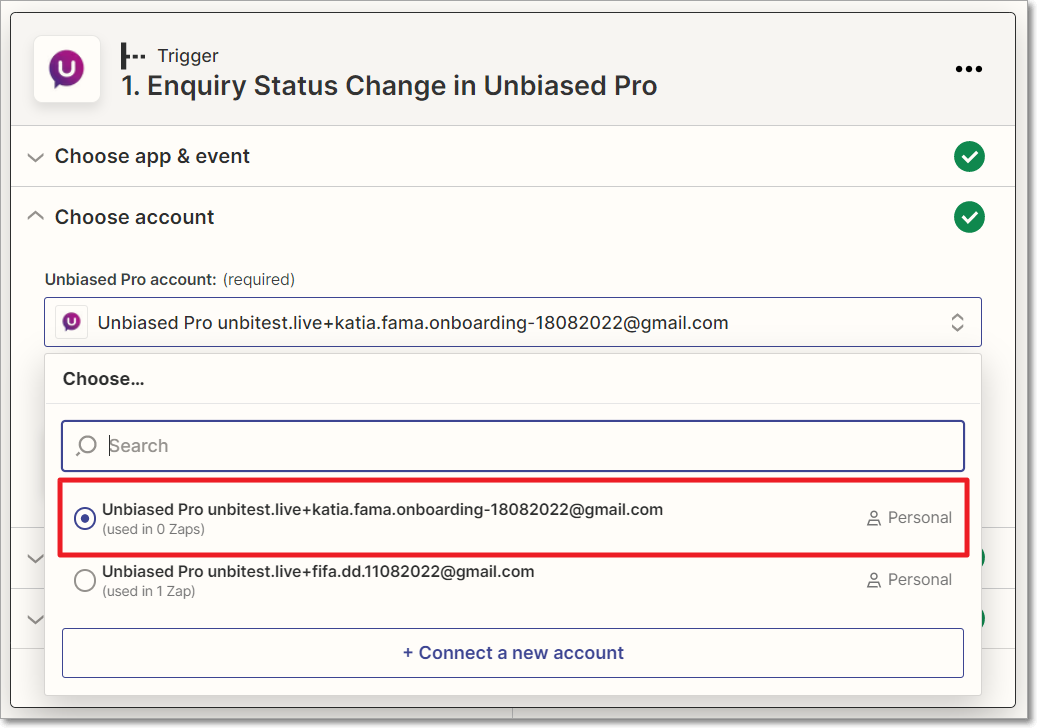
Click on Step 1 (the Trigger) and expand the Account section
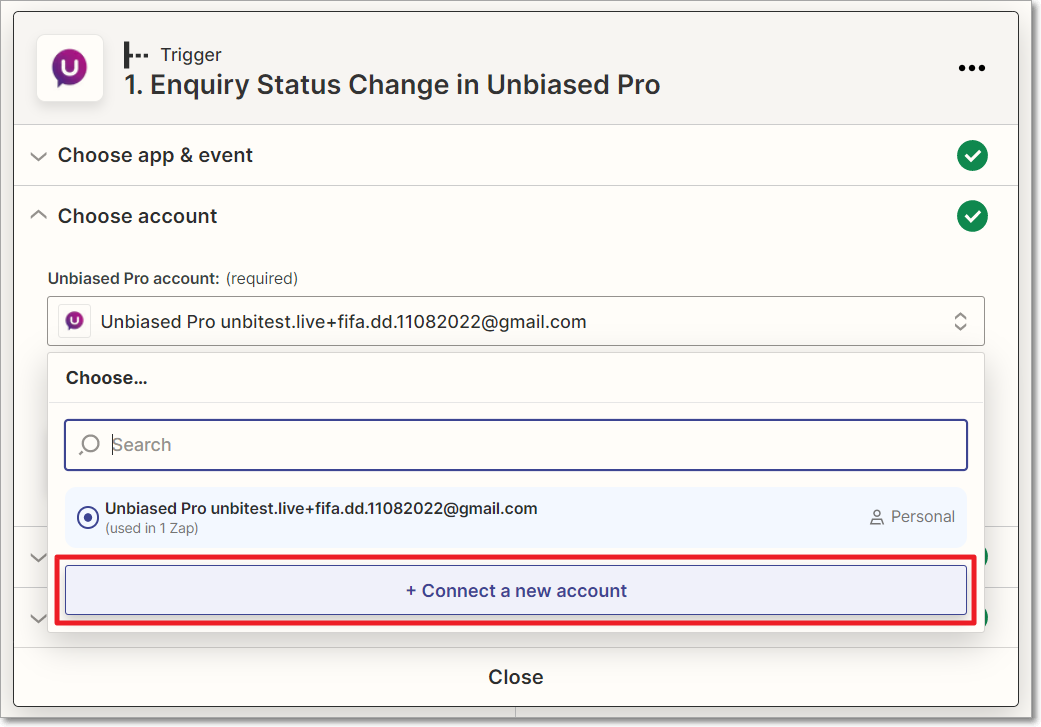
Click on the account (dropdown) and then Connect New Account
 Follow the on-screen instructions (in the new window), pasting in the new API key.
When you continue, the new account should be auto-selected. However, you can check by clicking the account dropdown again.
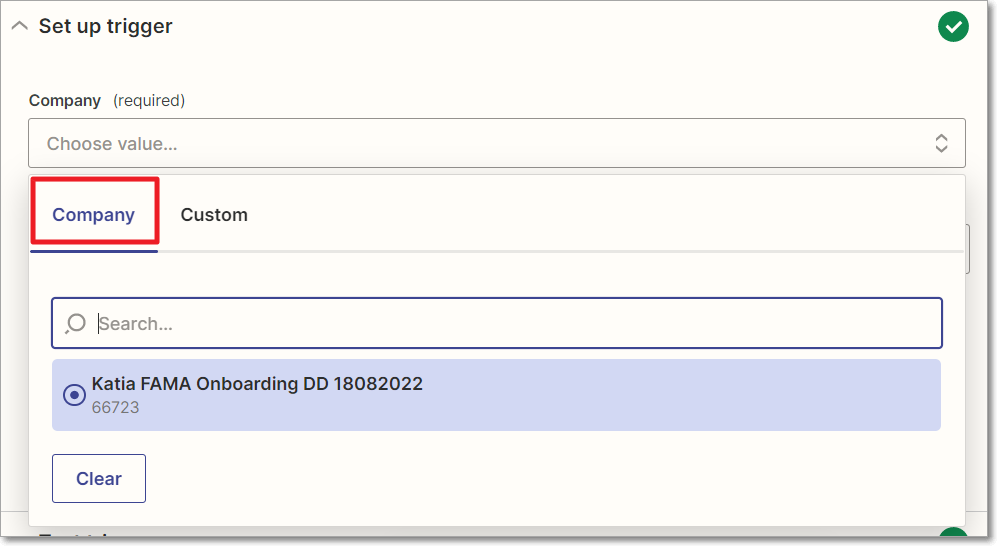
 Hit Continue, and you'll then need to select a new Company.
Select the Company tab, then your new Company from the list.
The Statuses should be remembered from your previous Company, so click Continue.
When prompted, test the trigger again.
If everything works as expected, you can now publish your Zap again. However, it is recommended that you click through each of the action steps (testing when prompted) so that you can be certain that data from your new Company is being sent to your CRM. If you do this, remember to publish and turn your Zap on when finished.