.png?width=239&height=70&name=UnbiasedPro__Logotype__Primary_RGB_HR%20(3).png)
From what you tell us, keeping track of your leads takes time and effort. That’s why we’re bringing our Growth, Standard, Premium, Enhanced and Enterprise customers a free way to consolidate all your enquiries into your CRM system. No more data transfer from different systems and spreadsheets, no more manual inputting and no more unnecessary time that could be spent doing better things.
Please note that the Zapier API integration is available on Growth, Growth Plus, Premium, Standard, and Enhanced plans only, and is not supported on Unbiased legacy plans (Plus, Unlimited, or Simple).
Using Zapier, you’ll be able to:
- Automatically transfer all your Unbiased enquiries to your CRM (and other business systems)
- Sync your leads so you are always up-to-date
- Save time on managing multiple systems
Let's get started!
FAQs
- What is Zapier?
- Is Zapier free to use?
- Which systems can I connect to Unbiased using Zapier?
- If Zapier does not support your system...
- How do I get started?
What is Zapier?
Zapier is software that makes it easy to automatically transfer data from one cloud-based system to another (e.g. from Unbiased to your CRM).
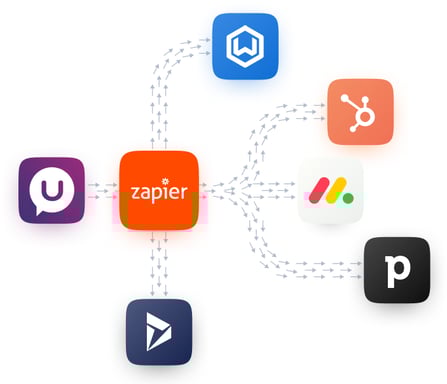
It helps you to automate the process by allowing you to create a workflow called a Zap in just a couple of minutes (with no coding knowledge required).
- Choose a trigger -
Pick an event in Unbiased such as Accepting or Converting a new Lead - Choose an action -
Tell Zapier what to do next e.g. Create a new lead in your CRM using the lead data from Unbiased - Sit back and relax -
Each time your Zap runs (typically every 15 minutes) Zapier automatically and securely sends you data from Unbiased to the system(s) of your choosing.
Is Zapier Free to Use?
Zapier has a 'free forever' plan. The free plan does have some limitations, but will be suitable for many advisers. For the latest information about what is included, please refer to the Zapier pricing page.
Which systems can I connect to Unbiased using Zapier?
Zapier currently can be used to connect over 3000 apps (see the full list). The most popular apps we expect Unbiased customers to connect with include:
-
Hubspot
-
Microsoft Dynamics
-
Monday.com (see the additional help sections at the end)
-
Pipedrive
-
FLG
-
Wealthbox
-
Zoho
-
Capsule
-
Microsoft Suite (including Outlook)
- See the full list
If Zapier does not support your system...
Users of Smartr365 can leverage the Leads API which Smarter365 can provide access to. The way this would work is that each time a trigger occurs (e.g. accepting a Lead in Unbiased), Zapier can be used with the Zapier Webhooks app to push data in Smartr365 via the Smartr365 Leads API. Please contact the Smartr365 Support team for assistance - support@smartr365.com
Getting Started Checklist
- Create a Zapier Account
- Create a new Zap
- Create a Trigger (and connect your Unbiased Pro account)
- Specify the System to Receive your Unbiased Data
- Data Fields Available to Sync?
In this section you'll also find:
How do I use Zapier to send data from Unbiased to other systems?
At first glance the instructions may appear a little overwhelming - however, there are a lot of images and we'll guide you through the process click-by-click. Each step is very quick and easy, and the whole setup should only take 10-15 minutes. Thereafter everything is automated so, once complete, you can start saving time straight away.
Create a Zapier Account
If you don't already have a Zapier account, first visit Zapier.com and sign up for a free account.
Create a New Zap
You can connect two or more apps through your Zapier dashboard to automate repetitive tasks without coding or relying on developers to build the integration.
Note that what you see on screen may vary slightly as Zapier update their software. For the latest help please see the Zapier help centre.
Start by clicking Make a Zap
Next it is a good idea to name your Zap (at the top left of the screen) e.g.

Create a Trigger
In the Trigger section, start typing to search for the Unbiased Pro Zapier app
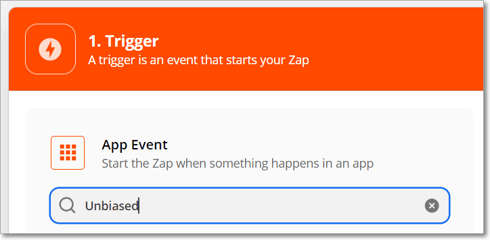
Click on the Unbiased Pro app to select it once it displays in the list.
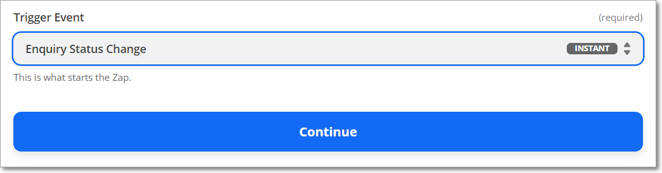
Now select Enquiry Status Change as the Trigger Event, then click Continue
If you have never connected your Unbiased Pro account to Zapier before, you'll be asked to sign in to Unbiased. Click the Sign In button when prompted (otherwise, just choose your Unbiased account from the connected account list - normally there will only be one).

A new browser window will open and you will be prompted to enter your API key
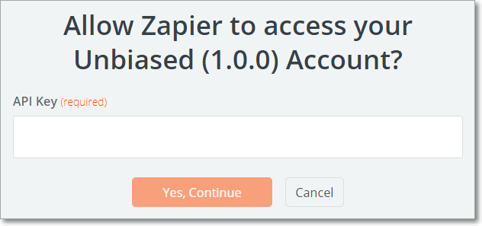
Your API key can be found in the Integrations section of the Unbiased Pro app. Note that you will need FULL ACCESS permissions to your Unbiased company account to obtain this. For more help with API Keys, please see our guide to Unbiased Pro API Keys.
If this is your first use, then you will need to Generate an API Key within Unbiased Pro. If you already have a key, use the Eye icon to display it. Then click the Copy icon to save it to your clipboard.

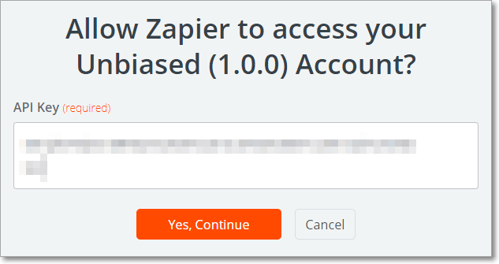
Paste your API Key into the Zapier prompt (which will probably have opened in a new browser window) and click Yes, Continue.
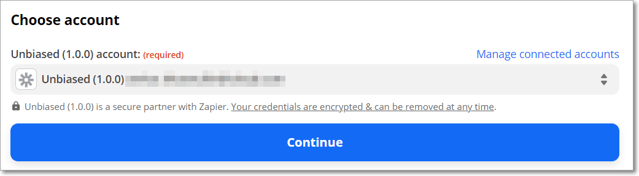
You can now click Continue on the selected Unbiased Pro account.
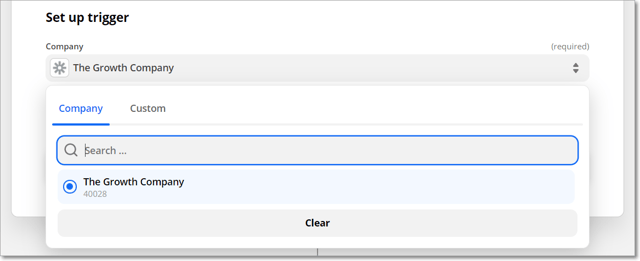
You will then be prompted to select which Company data you wish to sync. Normally you will only have access to one company, but you can select the desired one if you have access to many.
Note that if you do have multiple Companies, you will need to set up a separate Zap for each one.
After you've chosen the correct Company, you can choose which enquiries to sync.
There are 3 common scenarios that determine which enquiries you might want to sync. These are:
- Send only Accepted enquiries from Unbiased to your CRM
This is preferred when you want all Accepted Unbiased Enquiries to immediately be sent to your CRM so that you can manage them there going forward. - Send only Converted enquiries from Unbiased to your CRM
This is preferred when you only want confirmed new clients in your CRM (and unconverted leads to remain in Unbiased Pro) for ongoing management. - Send all enquiries from Unbiased to your business system(s)
This is preferred when you want to manage your Accepted enquiries and perform business analysis on all leads you receive from Unbiased.
Depending on your requirements set up the statuses as per one of the examples below (click the box to choose a value):
Send enquiries as soon as they are Accepted
Send enquiries only when they are Converted
Send all enquiries to Unbiased
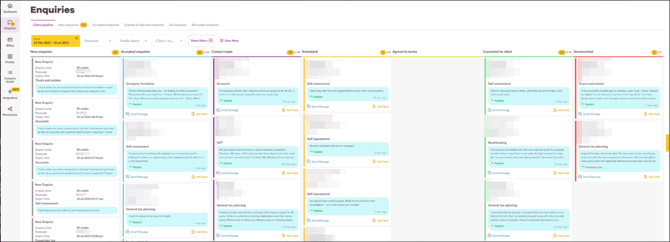
Note that in the last example above, we've explicitly chosen Status Change Triggers for when an enquiry is either Accepted or Rejected by you, or when it Expires or becomes Unavailable. If we left the Status field blank then every Pipeline Status change (e.g. Contact Made, Scheduled, Agreed to Terms) would result in a record being sent, and this would create duplicate records - as the same record would be sent on Acceptance and on Contact Made (as you move it through the Pipeline (see image below).
If you want this level of control, see the Advanced Zapier Filters section below. However, this will be unnecessary for most users and requires a paid Zapier account.
Now you will be prompted to test your trigger. Click Test Trigger.
If the test is successful, you'll see a recent Enquiry or sample data.
Make a note of the enquiry_pipeline_status as this will affect whether your test record is sent later.
Click Continue.
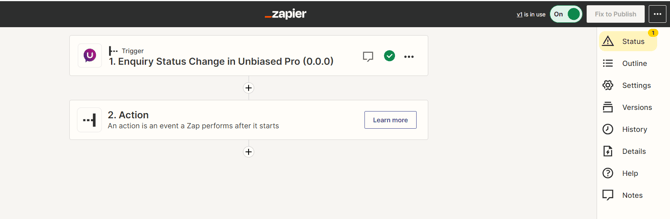
Your Trigger is now complete. Next we will...
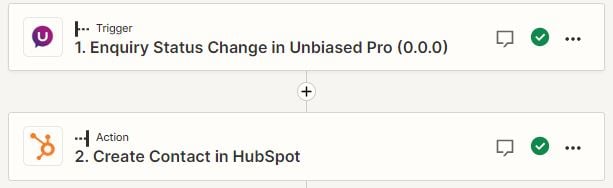
Specify the System to Receive your Unbiased Data (Create an Action)
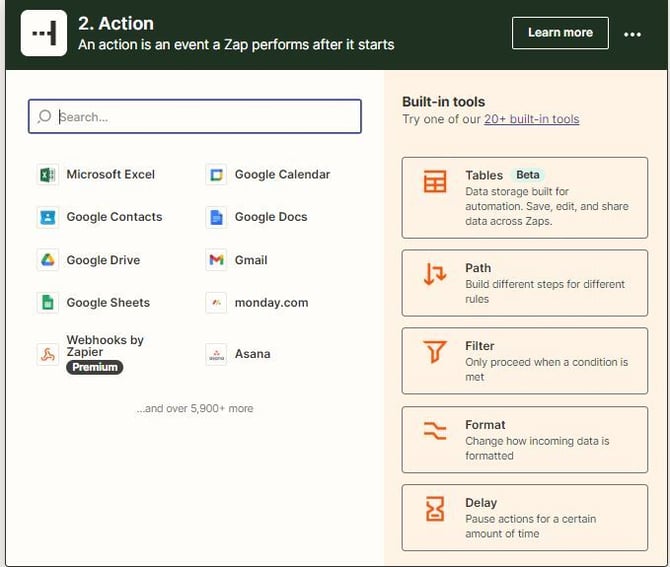
Search for the system you want to send data to (and then click it once it appears in the list). This example uses Hubspot - but Zapier connects to over 3000 apps, including Excel (and the overall process is similar for all systems).
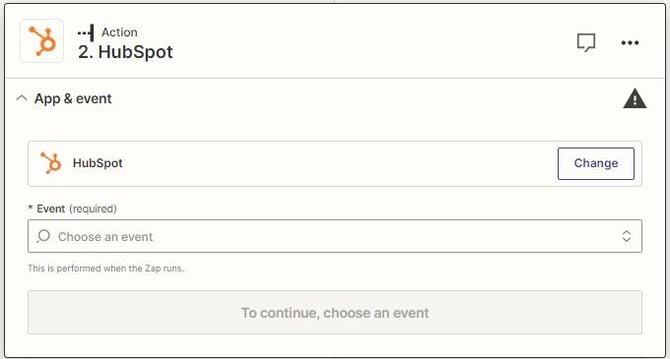
Depending on the system you choose, you'll be presented with different options for the Action Event. Ordinarily the desired Action Event will be to 'create a new... contact, row, record, etc'.
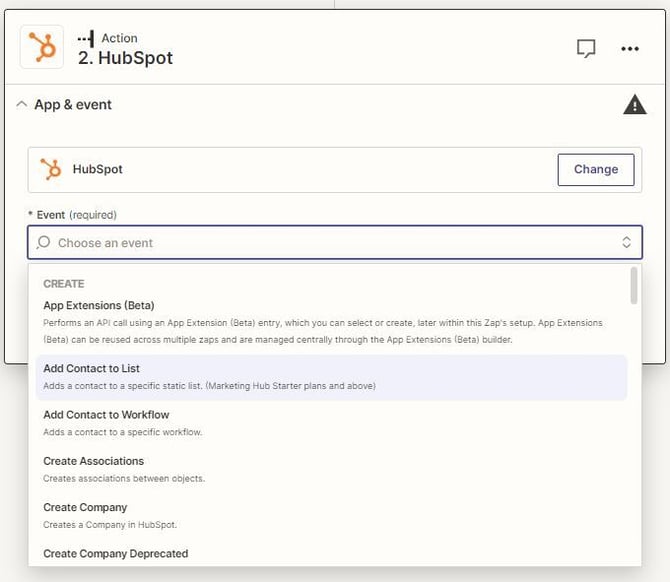
After choosing the Action Event, click Continue.
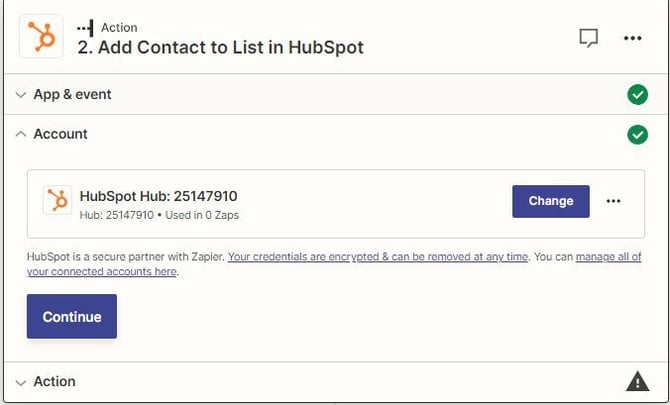
If this is the first time you've used Zapier, or used this software with Zapier, then you'll be prompted to sign in. When prompted to sign in, use your credentials for that system, not Unbiased.
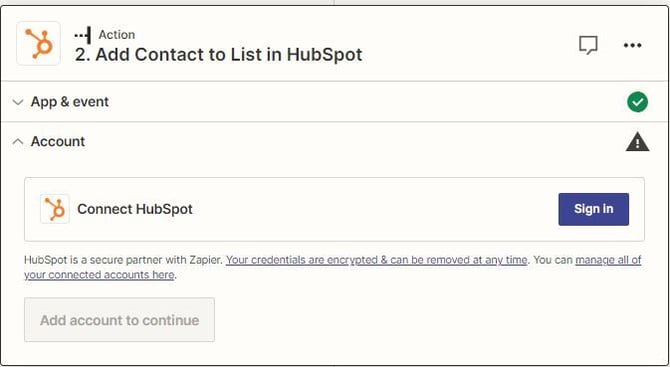
Click the Sign In button and follow the prompts to connect your account. The process will be similar to the one you used earlier to connect your Unbiased account (with the login prompt opening in a new window), though it is more likely you'll be asked for a username/password rather than an API key.
Once your account is connected, ensure it is selected in the dropdown, then click Continue.
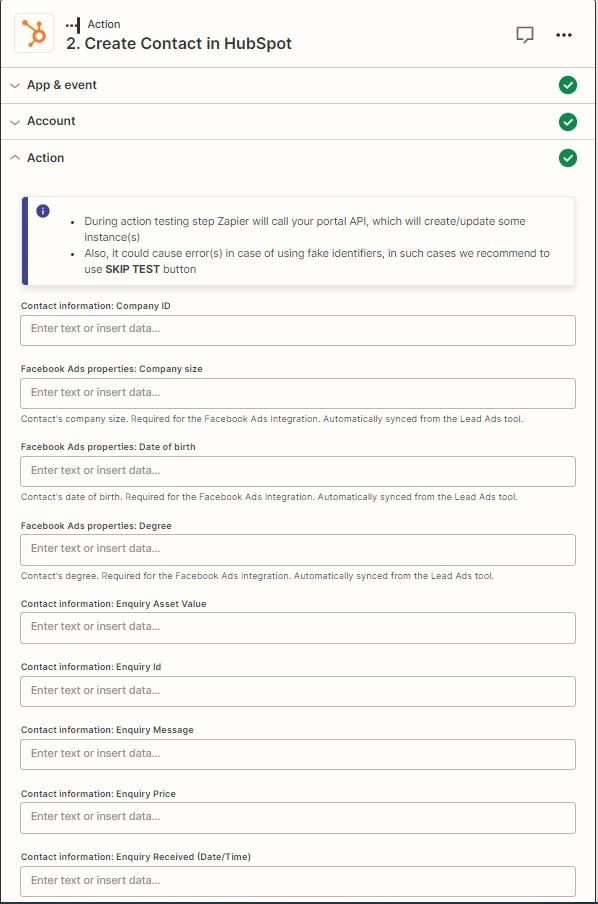
You will now be presented with all of the fields you can populate in your chosen system.
Go through each one and select the Unbiased data to populate the relevant field with.
Note that you may need to use the 'Search...' or click 'Show all options' link to find the field you want. A full list of available fields data is available lower down this page.
This example shows selecting the First Name from Unbiased to populate the first name in Hubspot.
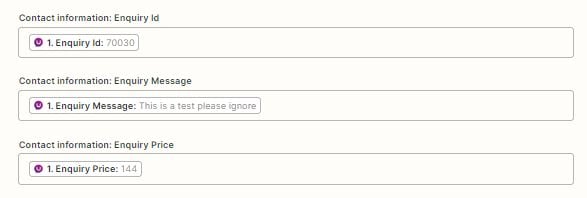
Which will look like this once selected:
Note that (depending on the field type) you can populate the receiving system's fields with:
- Options from that system (e.g. Deal Status)
- Free text that you type in
- Data from Unbiased
- A combination of free text and data from Unbiased (as per the example below)
Repeat the process until you've specified which data you want in all of the desired fields.
Once you've finished, click Continue.
You'll then be presented with summary data and two test options:
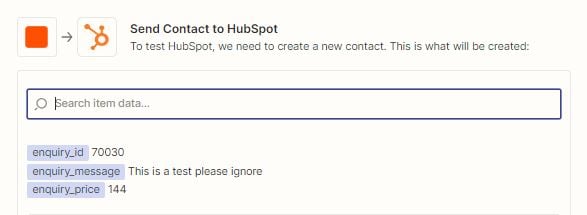
Click Test & Review (which leave the opportunity to easily make changes and retest if needed).
After the test has been run, check your system to make sure the data had come through as desired (note that it may be necessary to wait a few seconds and/or refresh the page in the receiving system).
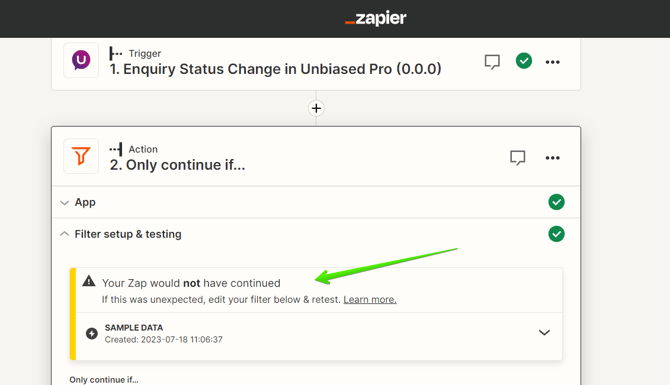
Note that it is also possible no test data will be received if your filter reported that the zap would not have continued. If this happens your test results might look like the screenshot below. This will happen if your test data is for a rejected enquiry (as these don't have full client details - which may be required by your CRM). If this happens, click Skip Test and then 'Turn on Zap' (as detailed below). You will then be able to check the Zap works when you next accept an Enquiry (by seeing whether it comes through to your CRM).
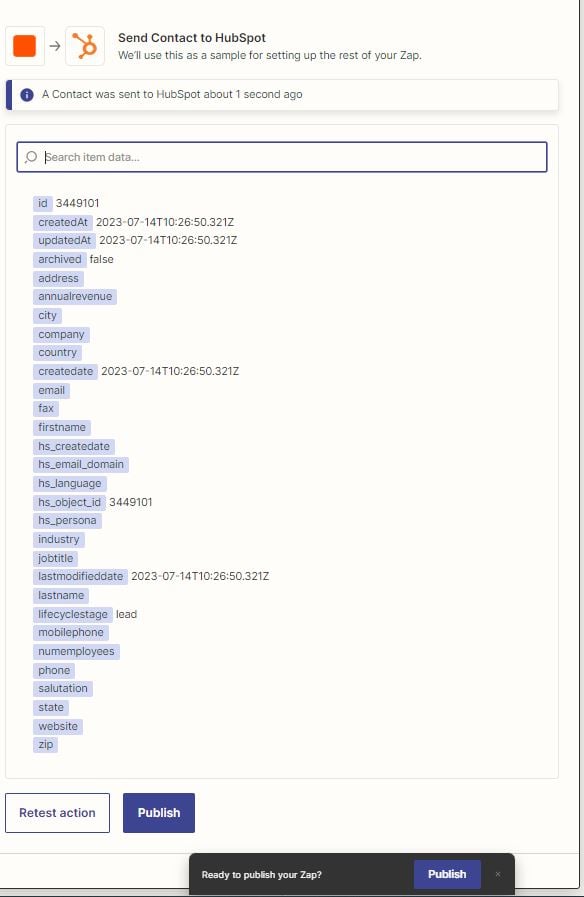
If you filter step reports that the filter would have continued, then the test should have succeeded and you'll have a new record in your CRM. Our Hubspot example came through like this:
If you want to make changes you can go back to the Setup Action section, make changes and retest.
Once you're happy everything is working as desired Turn on your Zap.

Now that your Zap is on, every time you have an Unbiased Enquiry that meets the specified filter criteria, within a couple of minutes, that data will appear in your system of choice.
Which Fields and Data are Available to Sync?
Fields in bold are the most commonly useful fields for managing leads in your CRM.
For our US customers, please note that the field names use our UK terminology. Simply substitute "Enquiry" with "Lead" and "Postcode" with "Zip Code" when identifying the fields you wish to use.
- Enquiry ID
- Branch Enquiry ID (the best unique identifier for the Enquiry)
- Enquiry Created
- Enquiry Received
- Enquiry Status
- Enquiry Pipeline Status
- Enquiry Price
- Branch Name
- Branch ID
- Branch URN
- User Name(s)
- Branch Minimum Preferred Clients
- Processed (Accepted/Rejected) Date
- Matched Postcode
- Client First Name
- Client Last Name
- Client Postcode
- Client Phone
- Client Email
- Primary Advice Area
- Secondary Advice Area
- Message
- Value
- Timezone
Getting Help
For help using Zapier please see the Zapier help centre.
For help using Zapier with Smartr365 contact the Smartr365 Support team - support@smartr365.com
If you use Intelligent Office, Xplan or other systems that are not yet listed on Zapier, please reach out to us and let us know as we may be able to help with alternative solutions.
For help with Unbiased Pro, please contact Unbiased Support - pro@unbiased.co.uk
Advanced Zapier Filters (not required for most user requirements)
Each time you Accept an Enquiry or move it along the Pipeline (illustrated below), the (Pipeline) Status of that Enquiry changes.
You can use that Status change to specify which Enquiries are sent to your CRM (or system of choice). Normally it is best to do this in the Trigger section (as described above). However, if you want more granular control for any reason, you can use a Zapier Filter.
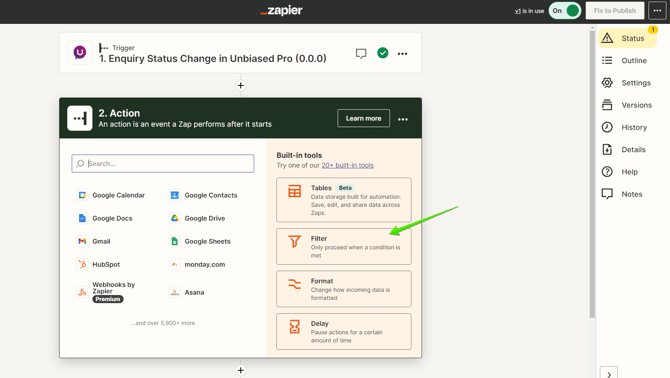
Click the + button between the Trigger and Action steps
Select the Filter option (as indicated by the arrow on the screenshot below).
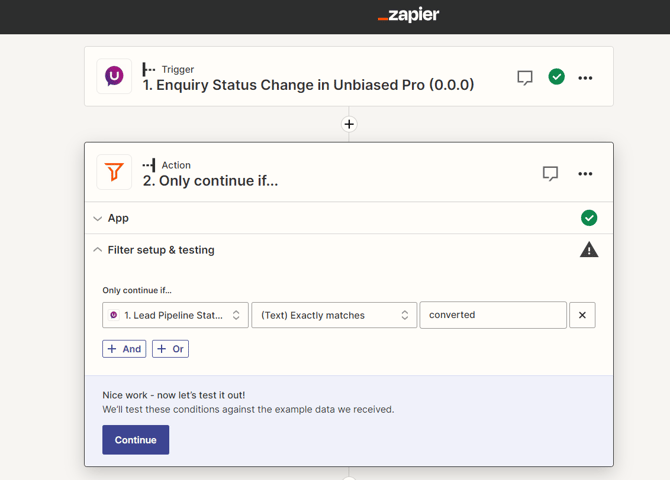
Now configure your filter as follows:
- In the first box select 'Enquiry Pipeline Status'
- In the second box select 'Text Exactly Matches'
- In the final box, type (or copy/paste) the Pipeline Status according to your requirements
For example converted or accepted_enquiry.
You do not need to select anything from the dropdown (just type/paste the text).
It should end up looking similar to this:
The full list of available Pipeline Statuses are:
- accepted_enquiry
- contact_made
- scheduled_appointment
- agreed_to_terms
- converted
- unconverted
- rejected
- expired
- unavailable
The examples have focussed on sending Accepted Enquiries (either immediately upon acceptance or after conversion) to your CRM for ongoing management. Sometimes you might want to send every enquiry you receive to your Business Intelligence system for more detailed performance analysis. In that case, the filter might look more like this (specifying multiple criteria using the + OR button)...
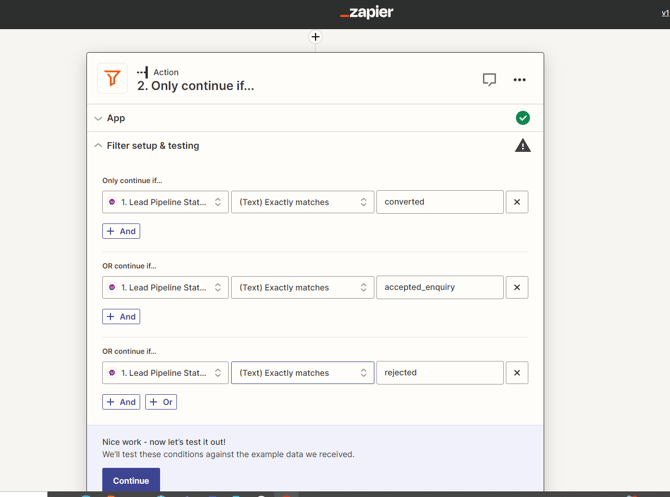
By specifying every Accepted, Rejected, Expired and Unavailable Enquiry - you are effectively saying that you want to 'send every enquiry' to BI system.
Whether you choose to send every Enquiry, or only Accepted/Converted enquiries, click the Continue button to check that the filter would have worked (based on the sample data from Step 1).
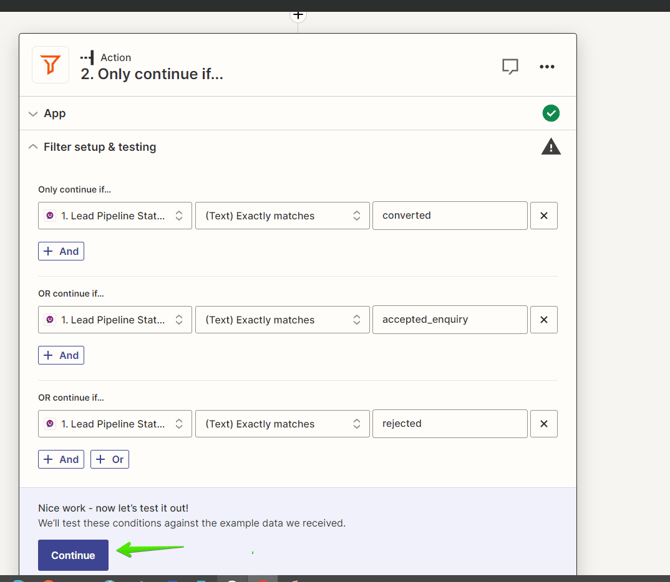
Zapier will then tell you whether, based on the sample data, your Zap would continue past the filter (i.e. whether it met the conditions you just specified).
Note that if your filter is for accepted_enquiry status enquiries only, and the sample data contained an enquiry with a different status (e.g. rejected), then it is expected that this step will display that the Zap would not continue - which would be correct.
Once you've set up the filter, you can retest Step 3 (the Action) to check that your filter works as desired.
Is it possible to send data to Unbiased from other systems (2-way sync)?
At the time of writing, this is not possible. It is best to think of Zaps like one-way workflows.